> 3000 Ave Marias -- Songs of Sharon -- Remi Ghesquiere -- St-Basil's Hymnal --  PROJIMO -- Computer Games

North Wing
Home Up BGAE Intro Hovercraft repair Black Isle 1 Black Isle 2 Pedestrian District Nutripils Factory Nutripils factory 2 Nutripils Factory 3 Slaughterhouses: entry Surveillance Room North Wing East Wing and exit. Exit. The Beluga Mini-Missions Selene 1 Selene2 Endgame.


Back Next

The Slaughterhouses, part 3: North Wing.

play/stop MP3   

bullet
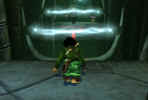
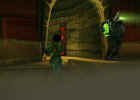
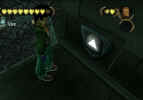
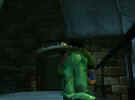
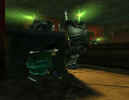
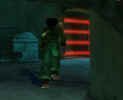
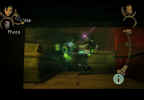
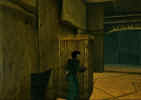
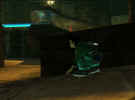
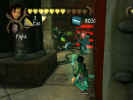
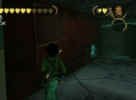
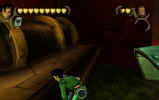
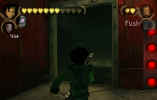
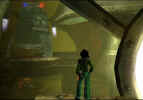
To the right of the waterfall, jump up the skeleton ramp and at the top turn right and dock.
bulletWall-hug to get past the narrow pipe opening. Crouch and forward roll towards the guard in the distance. 
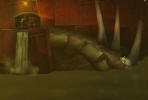
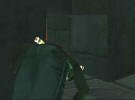
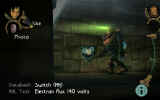
  1104.jpg (61085 bytes)  


bullet1 guard.
bulletShoot a disk at the button to his left. He’ll fall down.
bulletStep on the platform. Shoot another disk.
bulletJump over and crouch under the 2 barriers.
bulletMove towards the next room. 

1107.jpg (43169 bytes) 1108.jpg (54623 bytes) 1109.jpg (57771 bytes) 1110.jpg (41690 bytes) 


bullet
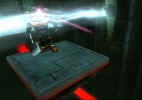
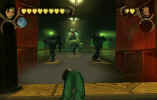
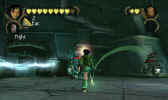
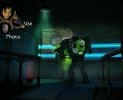
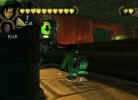
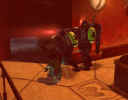
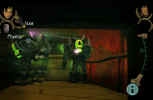
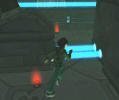
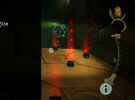
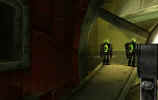
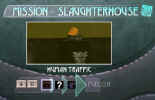
4 guards in fog room + instakill robot.   (= "M5 Laser Turrets")
 
Don't even think of fighting here!
 
bulletThe laser turrets will kill you instantly when the alarm is sounded. 


bulletThe guards cannot see you as long as you’re under the fog.
bulletAs soon as you reach the fog, crouch and forward roll x2 to enter the room. 
bulletTurn towards the guards, so you can see them.
bulletCrawl until you are just in front of the bump and between the 2 closest guards.
bulletWhen they are both looking away, forward roll over the bump.
bulletIf you have your direction straight, you’ll still be under the fog. 
bulletFollow the ditch and crawl forward and then to the left until just before the next bump. 
bulletWhen the middle guard looks away (to your right), forward roll x2 over the next 2 bumps and start running.
bulletAs long as you do not touch the guard, you can make it past him and through the door before he gives the alarm. 

1111.jpg (64738 bytes) 1112.jpg (37239 bytes) 1113.jpg (45381 bytes) 1114.jpg (37555 bytes) 1115.jpg (47034 bytes)


bullet
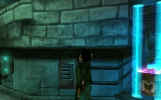
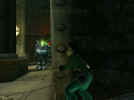
1 fuse. Move on and kick the power box ahead. 
bulletRun zigzag past and jump over the blue laser beams to take the fuse at the end of the hall. 
bulletPlace the fuse in the receptacle next to the elevator and go up. Enter the next room. 

1116.jpg (72528 bytes) 1117.jpg (56382 bytes) 1118.jpg (47082 bytes) 1119.jpg (51710 bytes)


bullet
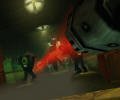
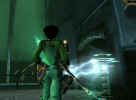
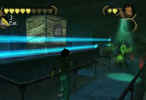
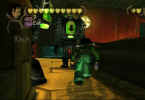
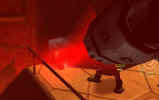
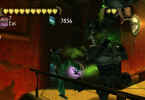
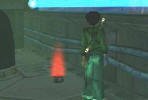
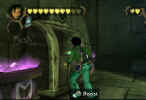
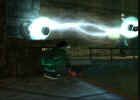
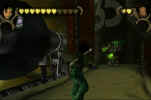
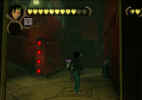
2 laser robots. Stand between the bots and jump aside just before they fire. 
bulletHit the one on the right into the barrier on that side and run through. 

1120.jpg (82207 bytes) 1122.jpg (65751 bytes) 1123.jpg (68405 bytes) 


Posted on YouTube:  


==================================
 

bullet
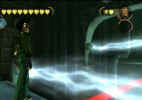
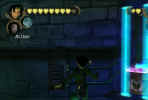
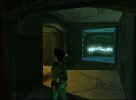
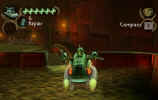
If you want the PA1, you’ll need to knock the second robot into the other barrier to the left, and make it past 2 alpha guards in the room behind the door.

1124.jpg (65873 bytes) 1125.jpg (44920 bytes) 1126.jpg (45938 bytes) 1129.jpg (46019 bytes) 1130.jpg (62954 bytes) 1131.jpg (29511 bytes)


bulletWalk past the mines. 
bulletCutscene: 4 guards + instakill robot.  
bulletAs soon as you get to the door, crouch and roll/crawl until behind the little wall. 
bulletWhen the guard turns to go back, crawl behind him 
bulletHead somewhat to the left as soon as you're past the 2nd guard that is standing still. 
About halfway that stretch, forward roll x2 into the opening.
bulletAs long as you don’t touch the guard, you will get away with it.
bulletThey will call the alarm, but by that time, you’re already safe in the next room

1132.jpg (66957 bytes) 1133.jpg (49645 bytes) 1134.jpg (57988 bytes)1138.jpg (65571 bytes) 1139.jpg (64157 bytes) 1140.jpg (27662 bytes)

 
bulletBe careful not to touch the guard or you're toast. 

     1135.jpg (41195 bytes) 1136.jpg (31212 bytes)

bullet 
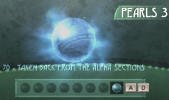
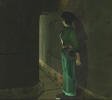
Take the pearl (#70=3). 
bulletCrouch in front of the opening
bulletShoot a disk at the walking guard when he’s at the end of his walk.
bulletThen just shoot the others one by one as they come to help. 
bulletGo back into the room, and exit through the door on the left. 

1141.jpg (53728 bytes) 1142.jpg (57499 bytes) 1143.jpg (65950 bytes) 


bullet1 fuse.
bulletPush the crate ONCE towards the exit door to open the crawlway.
bullet(save?) 
bulletStand in font of the electric box and line up your viewing angle with the hole.
bulletKick, crouch and roll x2 gets you in the other room.
bulletRun around the pedestal and leap-roll over the blue laser.
bulletTake the fuse. 
bulletCutscene: barrier down.
bulletExit by leap-rolling over and through the blue lasers again and use the elevator to go down. 

1144.jpg (44561 bytes) 1145.jpg (52397 bytes)


bullet1 Guard.
bulletYou can run all the way through this room, and through the door near the pillar. 
bulletIf you want the PA1 in the room behind the guard, roll behind the pillar to shoot him.  ... minutes extra time.

1150.jpg (45337 bytes) 1151.jpg (39283 bytes) 1152.jpg (61860 bytes) 


bullet
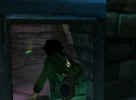
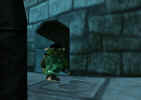
1 guard. Roll forward and into the crawlspace to the other side. 
bulletHide behind the little wall.
bulletWhen the guard gets on the platform, shoot a disk at the button. 
bulletGet on the platform, shoot another disk. Move to the next room. 

1153.jpg (44897 bytes)  1154.jpg (57348 bytes) 1155.jpg (51561 bytes) 


bullet
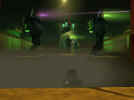
3 guards. Hide behind the corner and shoot the guard that is walking by. When the next one comes, repeat. 
bulletWhen the third one goes, start running. If you don’t get away with it, super-attack to kill the remaining guard(s). 
bulletMove on and place the fuse in the receptacle. Roll under the half-open door and meet up with HH. 

1156.jpg (44155 bytes) 1157.jpg (48409 bytes) 1158.jpg (62338 bytes) 1159.jpg (53817 bytes) 1161.jpg (41025 bytes) 1162.jpg (50867 bytes)


bullet
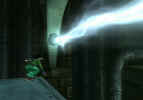
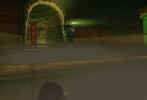
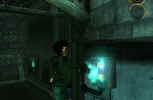
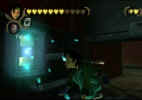
Switch off the red laser barrier. Jump up the open doorway straight ahead.  
bullet
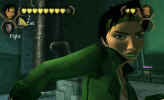
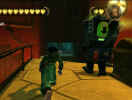
Cutscene: Central hall - 3 guards.
bulletJump down and WALK halfway towards the lonely guard to shoot him. 

1163.jpg (59537 bytes) 1164.jpg (53494 bytes) 1165.jpg (55748 bytes) 1166.jpg (51901 bytes) 1167.jpg (55279 bytes) 

bullet
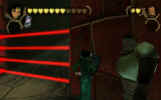
HH action button to keep the other guards busy while you super-attack them.
bulletTake the (1st?) mission report picture.
bullet
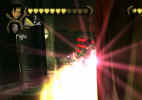
Head back to the hovercraft and jump down the waterfall. 
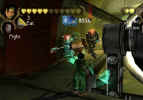
1168.jpg (72082 bytes) 1172.jpg (54751 bytes) 1174.jpg (49697 bytes) 1175.jpg (51797 bytes) 1176.jpg (72295 bytes)


Posted on YouTube:  


Continue with The Slaughterhouses, part 4:  the East Wing.

Page last modified: September 18, 2011

Back Next

G-2b, playing the fast game. 

BGAE music: ©2004 - UBISoft Montreal - Christophe Heral
Return to BGAE homepage

Return to my homepage: www.avemariasongs.org

Back Up Next
 

Thank you for visiting Geert's Ave Maria pages.  My guestbook is always only one page away.
Please do not use my guestbook for spamming, flaming or commercials for other websites. Such entries will be deleted.

 Sign  my Guestbook!    Read my Guestbook!
 
Questions or comments about this web site?    E-mail me: infoemail meavemariasongs.org
Who has visited this BG&E website since March 16, 2011

 free counters
 

Who has visited Geert's Ave Maria pages since April 29,  2010? 

free counters
 
# page views since November 22,  2009: visitors online right now.
 
today's stats:      

This website was developed with Microsoft FrontPage for  
optimal screen resolution  1024
× 768